Another update to the Cyanogen Mod 7.2.0 based The End Rom is available as of February 18, 2012. This rom which is actually based on Cyanogen Mod 7.2 RC0 Kang by vo-1, has been updated with the latest version of the CM 7.2 Kang by vo-1 rom and some customizations have been done to make it even better. One notable change that you get with version 3.0 release is the addition of Go Launcher Ex as an Home replacement app for ADW Launcher. So, you don't like ADW launcher or want a launcher with features such as Hiding unwanted apps, making folders within app drawer, attached task managers and many others then Go Launcher Ex is just the right one to go for and thus the latest version of The End v3.0 rom comes in two version one with ADW Launcher and Other with Go Launcher Ex.
Also, other changes in this latest version 3 of The End rom includes Framework mod for addition of 30 Steps Volume, Addition of Lagfree v3 by Slaid480 and removal of Flash player application (it might disappoint some of you but you can install it later on if you want from this article). Also, the super user app is updated to latest version and since this rom is deodexed those of you who like customization can theme it pretty easily. So, let's head on to flashing this rom on your Samsung Galaxy Ace GT-S5830 smartphone and see it in action. But, before have a look at some of the screenshots below.
9. Reboot your device from your recovery main menu.
That's all. You now have upgraded to latest version of The End rom (which is itself based on latest CM7.2 rom). Take some time as you explorer through the Cyanogen Mod Settings and other parts in the rom. Once you are done with it then share your views about this custom rom with us at the comments below. Also, stop by and say thanks to the developer, kevinlekiller, as well as find more information about this rom at this thread on xda-developers forums.
 |
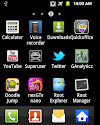
| Home Screen of The End v3.0 with Go Launcher. |
Disclaimer : Do It At Your Own Risk!
Note : Those who have Gingerbread 2.3 and above firmware and any Custom Recovery installed on their device can skip Step 1 and Step 2.
3. Download any version of The End v3.0 (listed below) from Galaxy Ace downloads section in Roms and Utilities page.
- The End 3.0a.zip : The End v3.0 with ADW Launcher.
- The_End_3.0g_0.zip : The End rom with Go Launcher.
4. Copy the downloaded file to ( the root directory of) your sd-card.
5. Reboot your device to Clock Work Mod Recovery (Press Home + Power Button).
6. [Optional but, Recommended] Do a Nandroid Backup of your current rom.
7. Choose Install Zip From Sd Card>>Choose Zip From SD Card option and then select the rom file which you downloaded in Step 3.
8. Wait for a while for the rom to be flashed and once it is done; Wipe Data and Wipe cache from clockwork mod recovery main menu. Also, Wipe Dalvik cache in Advance recovery menu.
8. Wait for a while for the rom to be flashed and once it is done; Wipe Data and Wipe cache from clockwork mod recovery main menu. Also, Wipe Dalvik cache in Advance recovery menu.
That's all. You now have upgraded to latest version of The End rom (which is itself based on latest CM7.2 rom). Take some time as you explorer through the Cyanogen Mod Settings and other parts in the rom. Once you are done with it then share your views about this custom rom with us at the comments below. Also, stop by and say thanks to the developer, kevinlekiller, as well as find more information about this rom at this thread on xda-developers forums.


![[UPDATE] CyanMobile reVo A 20120521 Update For Samsung Galaxy Mini/Pop GT-S5570](https://blogger.googleusercontent.com/img/b/R29vZ2xl/AVvXsEhYoVnMDVR2vFMjGZaI1eldy08sAgw1CFXO-f3rg3XRFMkIZZfqzHK6nUA4yGNIAmoNJH9TCl5Zao6ltrsy9PrKhfQ5uIzuO9koUvsD5MZVce2hwt_LbBdcogjLhQYlhxF7Atea4k0L3hmX/w100/CyanMobile-HomeScreen.png)

8 Comments
i think this didn't work for me :( it just stayed at ANDROID :(
ReplyDeleteThen please go back and wipe data and cache in clockwork mod recovery and reboot your device again. It will boot fine after few minutes.
ReplyDeleteme too! I got the same problem and it stayed at "ANDROID" even after wipe data and cache in clockwork mod recovery and reboot my device . Please help!
ReplyDeleteplease help me! it still stayed at ANDROID even after I wipe data and cache in clockwork mod recovery and reboot my device :(((((
ReplyDeleteok...so ur fone is currently bricked....bt dont panic...lets try another solution...jst reply ok..if u r der..
ReplyDeleteswitch off ur fone >press power and menu key together to go in recovery mode>click factory reset and then clear ur cache> reboot,...and ur fone will work...
ReplyDeleteread dis article..
ReplyDeletehttp://members.webs.com/MembersB/editAppPage.jsp?app=blog&pageID=261096743#blog/
Flash the ROM again in CWM recovery and then wipe both cache, data as well as dalvik cache (from advance menu) and reboot your device. Nor that it week take some few minutes to boot fire the first time so be patient and wait for 5-10 minutes.
ReplyDeletePlease share your view(s) through the comment(s) below.
Thank You!